

Finding a sticky, hardened patch of tree sap on your vehicle can be incredibly frustrating. Not only does it ruin the look of a fresh wash, but if left untreated, tree sap can severely damage your car’s delicate clear coat and paint. Whether you parked under a dripping pine tree or are dealing with aphid honeydew from an overhanging canopy, removing this stubborn residue requires the right approach. In this guide, we will explore the safest methods for removing both fresh and dried sap, what products to avoid, and when it might be time to schedule a tree health inspection to address the root cause of the problem on your property.
How Do You Get Tree Sap Off Your Car Without Damaging the Paint?
The safest way to get tree sap off your car is by softening it with a dedicated automotive sap remover, a citrus-based degreaser, or high-percentage isopropyl alcohol (70% or higher), and then gently lifting it away with a clean, plush microfiber towel. The key to successful sap removal is patience and understanding the chemical reaction occurring on your vehicle’s surface; you must let the solvents do the work of breaking down the resin rather than relying on physical force.
Gentle removal is absolutely essential because abrasive scrubbing or harsh scraping will inevitably scratch your vehicle’s delicate clear coat and the underlying paint, often causing damage that is far more expensive to fix than simply taking your time with the sap. The approach you take depends heavily on the sap’s condition. Fresh sap is still mostly liquid and sticky, making it relatively easy to wipe away with a gentle, soapy wash. Conversely, hardened sap has cured onto the surface, crystallizing into a tough, amber-like substance that requires careful chemical softening before it can be safely removed.
Understanding Tree Sap and Why It’s Bad for Your Car
Tree sap is a sticky substance produced by trees like pine, maple, and oak. It flows most heavily during warm months from late spring through early autumn, when trees are actively growing or have been wounded. Tree sap hardens quickly due to its high sugar content, and heat only accelerates that process.
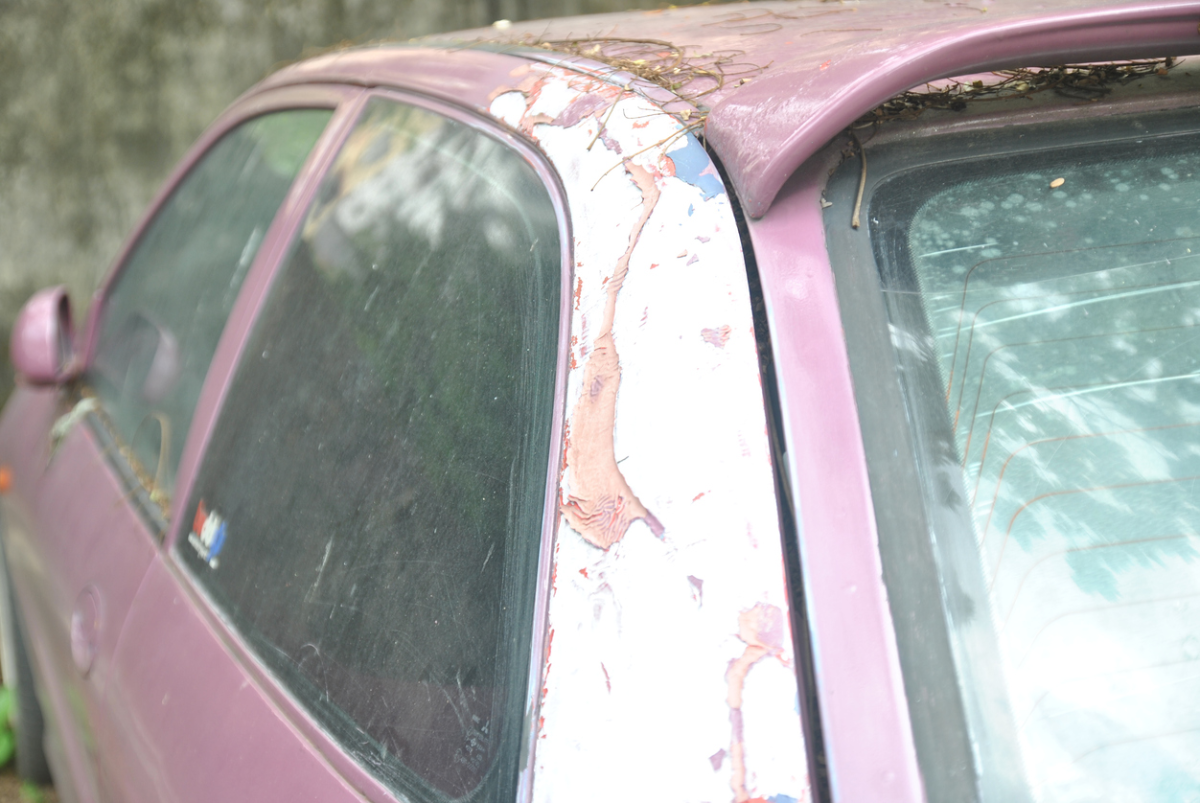
Sap and honeydew (a sugar residue left by aphids – over 5,000 aphid species can contribute to tree sap production) land on body panels and your car windshield whenever you park under conifers, street trees, or near park edges. Once sunlight and heat bake sap into the surface, it shrinks and creates mechanical stress on the finish. Tree sap can cause discoloration and dullness to car paint, and if ignored for weeks, it can etch through the clear coat permanently.
Modern automotive clear coats are only about 40–50 microns thick. That thin layer provides UV protection and gloss, but it means aggressive scrubbing or harsh chemicals during tree sap removal can cause more harm than the sap itself. Harsh scraping can cause permanent scratches on painted surfaces. Catching sap within the first 24–48 hours usually lets you remove tree sap with gentle, paint-safe methods, while older, amber-colored blobs demand stronger products and more patience.
Safely Preparing Your Car for Tree Sap Removal
Preparation is crucial. Dirt and debris around sap spots act like sandpaper when rubbed, potentially leaving scratches across the car’s surface during removing sap. Always wash the car before attempting sap removal.
Move the vehicle into shade or a cool garage. Heat causes solvents to evaporate too fast, reducing effectiveness and increasing the risk of potential damage. Give the whole vehicle a thorough wash using warm soapy water with a proper car wash shampoo and a soft cloth or wash mitt to remove dirt, dust, and loose contaminants. Rinse and dry completely, then visually note where sap spots sit on the hood, roof, trunk, and glass so none are missed.
Have these tools ready: multiple clean microfiber towels, a small bucket of soapy water, cotton pads for solvent application, plastic razor blades (glass only), and nitrile gloves. Microfiber cloths are necessary to avoid scratching the paint – never substitute paper towels or old rags.
What Do You Need to Remove Tree Sap From a Car?
You don’t need to invest in a professional detailing kit, but you do need the right basic cleaning supplies to avoid inflicting accidental damage. Before you begin, gather a wash bucket, a high-quality pH-balanced car wash soap, a hose with access to plenty of clean water, and several clean, high-pile microfiber towels.
Microfiber towels are crucial because their dense, soft fibers trap dirt and crystallized sap particles deep within the weave, rather than dragging them across the paint and causing swirl marks. For the chemical removal step, you should also use automotive-safe products. Commercial bug and tar removers, citrus-based adhesive removers, or isopropyl alcohol (rubbing alcohol) are excellent choices. These are specifically formulated to dissolve sticky, organic residues without chemically stripping or dulling the clear coat. Avoid using abrasive tools like scouring pads, stiff-bristled brushes, sponges with rough scrubbing backing, or harsh household chemicals like bleach, oven cleaner, or acetone (nail polish remover). These household products are far too aggressive and will severely scratch or chemically burn the paint, leading to costly repairs.
Effective Methods for Removing Tree Sap from Paint
Tree sap removal requires a gentle approach to avoid damage. Start with the least aggressive method and escalate only if needed. Always test products on a small, inconspicuous area first.
Warm soapy water: Soak a microfiber cloth in warm water with car shampoo, lay it over each sap spot for several minutes to soften the sap, then gently rub and wipe. Soapy water can dissolve tree sap without harming paint, and this works great on fresh deposits. Repeat until no more residue lifts. Soften the sap before wiping to prevent damage every time.
Isopropyl alcohol: Use 70% to 99% isopropyl alcohol for sap removal. Dampen a cotton pad or corner of a microfiber towel with rubbing alcohol, press it onto the affected area for 30 to 60 seconds, then gently rub in small circles until the tree sap loosens and transfers to the clean cloth. Isopropyl alcohol effectively dissolves tree sap without damage and evaporates cleanly, leaving minimal residue.
Commercial sap removers: Products like Stoner’s Tar and Sap Remover and other automotive tar and tree sap removal sprays are designed specifically for automotive surfaces. These sap remover formulas often use d-limonene or similar gentle solvents. Spray or dab the product on the affected area, let it dwell per label directions, then wipe with a microfiber cloth. They work particularly well on sap that’s been sitting for several days.
For stubborn, thicker sap, repeating a soak-and-wipe cycle several times is safer than trying to scrape hard. Let solvents dwell on sap spots for 30 to 60 seconds for effective removal, and patience protects the car’s paint far better than force.
Using Stronger Products: Mineral Spirits, WD-40, and Nail Polish Remover
These are last-resort solutions for dried, months-old sap that resists gentler methods. Each carries real risk of harming your finish if misused, so proceed with caution and always test in an inconspicuous area.
Mineral spirits: Apply a very small amount to a microfiber towel, dab only the sap spot, and let it soak for up to 60 seconds. Gently wipe the loosened residue, then immediately wash the area with soapy water and rinse. Mineral spirits can strip wax and sealant, so reapply protection afterward.
WD-40: WD-40 is a versatile product for removing tree sap and can remove hardened tree sap effectively. Spray it lightly onto the sap blob, let it penetrate for several minutes to loosen the goo, then wipe away with a clean cloth. Follow with a proper wash and reapplication of wax or sealant over the treated panel.
Nail polish remover: Acetone-based nail polish remover is the most aggressive option. It can quickly strip the clear coat and damage plastic trim or decals. Only use it on tiny spots with a cotton swab, test first, and rinse thoroughly. If discoloration or haze appears, stop immediately.
Never soak body panels in any solvent, never use household paint thinner not labeled safe for automotive use, and never mix different chemicals during tree sap removal.
How Do You Remove Dried Tree Sap From Car Paint?
Dried, hardened sap requires a bit more patience and a different technique, as it needs targeted chemical softening before you even attempt to wipe it away. Do not try to pick at dried sap with your fingernails, as it can pull the clear coat off with it.
Apply your chosen solvent—an automotive-safe sap remover, an adhesive remover like Goo Gone Automotive, or isopropyl alcohol—directly to the hardened sap. If the sap is on a vertical panel, you can soak a cotton ball or a small corner of a microfiber towel in the solvent and hold it against the sap spot. Follow the specific product directions, which usually involve letting the solvent sit on the spot for 30 seconds to a full minute to penetrate and break down the hardened resin. Carefully lay a clean microfiber towel over the spot and gently wipe; do not apply heavy pressure or scrub back and forth. If the sap doesn’t come off easily, do not force it. Instead, reapply the solvent, wait another minute, and try again. It’s crucial to repeat this softening process as many times as necessary. Aggressive wiping is a guaranteed way to scratch the clear coat and embed the hardened sap particles into the paint. After the sap is removed, it is highly recommended to re-wax the area, as solvents will strip away any existing wax protection.
Special Techniques for Tree Sap on Glass and the Car Windshield
Glass surfaces – your windshield, side windows, rear window, and sunroof – are far more tolerant of scraping and chemicals than the car’s paint. You can use slightly more aggressive techniques here without worry of harming the finish.
On a car windshield, soften sap first with isopropyl alcohol, a commercial sap remover, or warm water. Once softened, use a new, clean razor blade or plastic razor blade held at a low angle. Keep the glass wet with soapy water or glass cleaner and gently push under the sap to scrape it off in thin layers. Plastic scrapers can help remove stubborn, dried sap safely on glass as well.
Repeat the pattern: soak, lightly scrape, and wipe with a microfiber towel until the surface feels perfectly smooth. Finish by cleaning the glass with a quality glass cleaner to remove any smear or residue.
Avoid using metal razor blades on car paint – they cut the clear coat. Never use metal scrapers or abrasive pads on painted surfaces, plastic trim, or headlight lenses.
Post-Removal Care: Protecting Your Car’s Paint After Sap Removal
Most tree sap removal methods strip existing wax or weak sealants, leaving the car’s surface unprotected and vulnerable to future sap, bird droppings, sunlight, and UV damage. Failing to wash after sap removal can lead to chemical residue damage, so start by rewashing the treated areas with mild soapy water to rinse away any leftover alcohol, commercial sap removers, mineral spirits, or WD-40.
Applying automotive wax or sealant restores protection after sap removal. Apply a fresh layer of wax, spray sealant, or ceramic coating topper over each cleaned panel. This creates a slick, hydrophobic properties-enhancing surface that helps protect the finish and makes future removing sap far easier.
If sap has already etched or dulled the clear coat, a light polish with a dedicated automotive polishing compound may be needed to restore clarity before waxing. Inspect rubber seals and plastic trim near heavy sap areas and wipe them with a plastic-safe protectant if any residue is present.
How to Prevent Tree Sap Damage in the Future
Prevention is the most cost-effective strategy. Repeated tree sap removal is time-consuming and can gradually thin the clear coat, so stopping sap from sticking in the first place saves both effort and money.
- Parking strategy: Avoid parking under pine and fir trees, maples that drip heavily in late spring, and trees where aphids feed and produce honeydew. Even moving one parking space over can make a difference.
- Car covers: When long-term parking under trees is unavoidable, use a breathable car cover. Install it on a clean vehicle to avoid trapping grit against the car’s paint.
- Regular maintenance: Wash every 1–2 weeks during sap-heavy seasons to remove dirt and fresh sap before it bakes on. Re-wax every 3–4 months to maintain a sacrificial protective barrier between sap and the actual clear coat.
- Paint Protection Film: Paint Protection Film prevents tree sap from adhering to paint entirely, making it an excellent investment for vehicles that frequently park outdoors.
- Emergency kit: Keep a bottle of quick detailer or diluted isopropyl alcohol, a couple of microfiber towels, and disposable gloves in the trunk. Treating sap on the spot with prompt action works great and prevents the need for aggressive removal later.
Can an Arborist Help With a Tree That Keeps Dropping Sap on Your Car?
If a tree on your property is a constant source of frustration and sticky residue, a certified arborist can provide expert guidance and practical solutions. An arborist can accurately identify the true source of the excessive “sap”—determining whether it’s natural, seasonal sap production from a specific tree species, a secondary symptom of a pest infestation causing honeydew, or a sign of severe tree stress or disease.
Based on their professional assessment, an arborist can recommend targeted treatments for pest control, strategic pruning, or other comprehensive tree-care options to mitigate the problem at its source. Homeowners should never attempt to remove large, healthy branches or “top” a tree simply because of a sap issue without a professional assessment. Improper pruning techniques can severely damage the tree, introduce disease, stimulate even more erratic growth, and create hazardous structural issues that could pose a danger to your home or vehicles in the future.
If you’re dealing with problematic trees dropping sap or honeydew on your vehicles in New Jersey, the team at Taylor Expert Arborists is ready to help. Our certified professionals can evaluate your trees, accurately diagnose any underlying health or pest issues, and provide expert pruning and plant healthcare services to protect both the beauty of your landscape and the finish of your property.


