


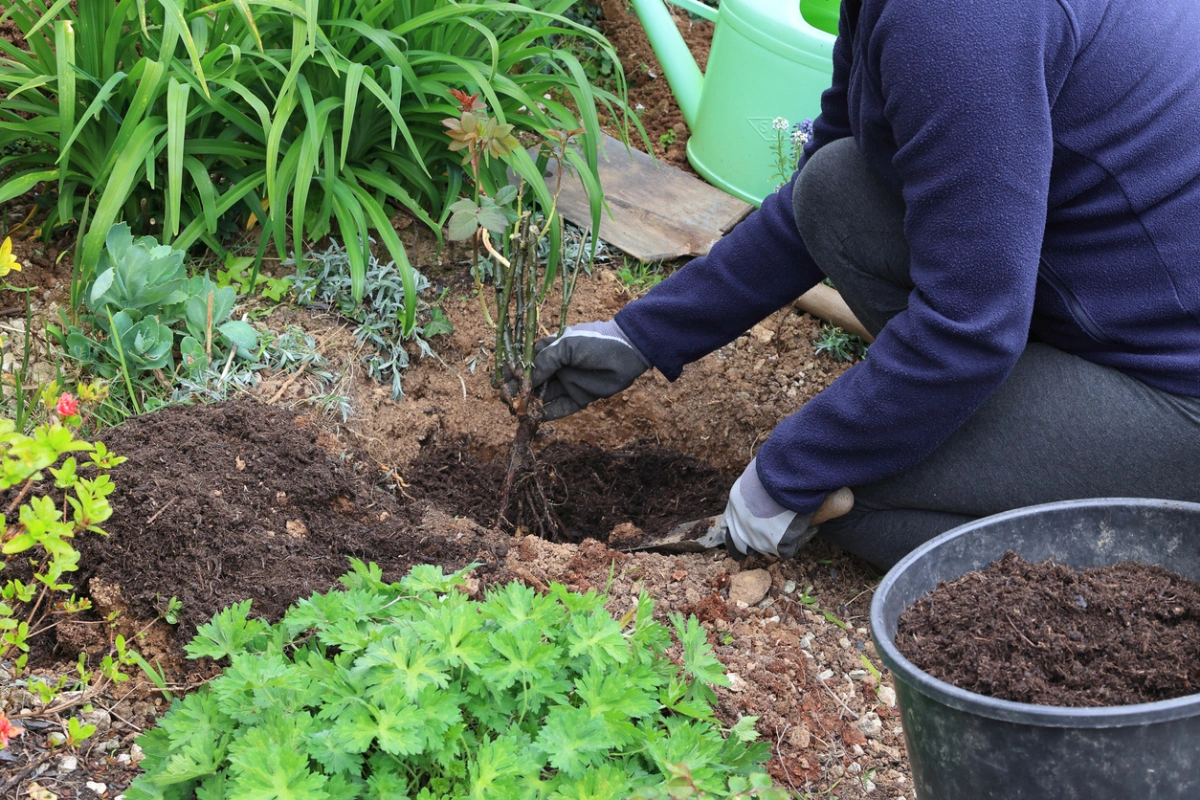
Stop planting in dead dirt. The secret to a massive, bountiful harvest this summer isn’t in expensive seeds—it’s 6 inches beneath your feet. Understanding how to prepare your soil for spring gardening is the non-negotiable first step to success, saving you time, money, and heartache later in the season. Before you start, ensure your overhead canopy is supporting the life below with a professional tree health inspection. For expert advice on how your trees and soil work together, feel free to contact us for personalized guidance.
In this guide, you will learn the comprehensive, step-by-step process of transforming dormant, compacted winter earth into a nutrient-rich, aerated foundation. We will explore the science of soil health, the logistics of spring cleaning, and the advanced techniques for amending your garden beds to ensure maximum growth and resilience.
The Science of Soil: Why Spring Preparation is Non-Negotiable
Winter is a season of compression. Between the weight of snow, the relentless pounding of cold rain, and the natural “settling” that occurs when biological activity slows down, your soil often emerges in March as a dense, anaerobic environment. Preparing garden soil for planting isn’t just about making it look neat; it is about restoring the life-giving properties that plants require to thrive.
Soil is a living, breathing ecosystem. It contains minerals, organic matter, water, air, and billions of microorganisms—bacteria, fungi, and protozoa—that work in a symbiotic relationship with plant roots. When you follow proper garden soil preparation steps, you are essentially “waking up” this microbiome. You are reintroducing oxygen, improving drainage, and ensuring that the chemistry of the earth is balanced enough for delicate root systems to absorb essential nutrients.
The Hidden World of Soil Microbiology
Beyond the physical texture, the biological health of your soil determines its fertility. During the winter, many beneficial bacteria and fungi go dormant or migrate deeper into the earth, where it is warmer. By aerating and warming your soil in the spring, you encourage these “garden helpers” to return to the surface.
Mycorrhizal fungi, for instance, attach themselves to plant roots and effectively extend the root system’s reach, allowing plants to access water and nutrients they could not reach on their own. These fungi also secrete glomalin, a “soil glue” that helps bind particles together into stable aggregates, creating that crumbly, high-quality structure gardeners love. Protecting these microscopic networks is a key reason why we emphasize low-impact soil preparation techniques.
Oxygenation and Root Respiration
Many novice gardeners forget that roots need to breathe. In compacted soil, the tiny air pockets (pores) are crushed. When you prepare your soil correctly, you restore these pores. Without adequate oxygen in the soil, roots can suffocate, leading to a condition known as root rot, even if you are not overwatering. Spring preparation ensures that as soon as the plant enters the ground, it has the atmospheric resources it needs to establish a strong structural base.
Assessing the Foundation: Soil Testing and Analysis
The best way to prepare soil for planting is to stop guessing and start measuring. Every garden is unique, and applying the wrong amendments can sometimes do more harm than good.
Conducting a Professional Soil Test
Before you add a single bag of compost or lime, you need to know your starting point. A comprehensive soil test provides a detailed breakdown of your pH levels and the concentrations of primary nutrients like Nitrogen (N), Phosphorus (P), and Potassium (K), as well as secondary micronutrients like Magnesium, Sulfur, and Calcium.
Most gardening experts recommend testing every two to three years. You can use a DIY kit for a basic reading, but sending a sample to a local university extension or a professional lab offers a much deeper look into the cation exchange capacity (CEC) and organic matter percentage. Aim for a pH between 6.0 and 7.0 for most garden plants, as this is the “sweet spot” where nutrients become most soluble and accessible to roots.
Evaluating Soil Texture and Drainage
Beyond chemistry, you must understand the physical makeup of your garden. Is your soil sandy, silty, or heavy clay? You can perform a simple “squeeze test” at home: take a handful of moist (not soaking) soil and squeeze it in your palm.
- Sandy Soil: If it falls apart immediately and feels gritty, it’s sandy. It drains fast but holds little nutrition because water washes the nutrients away (leaching).
- Loamy Soil: If it holds its shape but crumbles easily when poked, it’s an ideal loam—the “gold standard” for gardeners. It offers the perfect balance of moisture retention and drainage.
- Clay Soil: If it stays in a hard, sticky ball and feels smooth/greasy, you have high clay content. This holds water well but can become waterlogged in the spring and hard as rock in the summer.
Identifying these traits early allows you to tailor your spring soil preparation tips to your specific needs, such as adding extra grit to clay or more moisture-retaining organic matter to sand.
The Great Spring Cleanup: Clearing the Slate
You cannot build a healthy garden on a messy foundation. The first physical step in improving soil before spring planting is a thorough cleanup of the previous year’s debris.
Removing Overwintered Debris and Weeds
While leaving some leaf litter can be beneficial for pollinators during the winter, you should clear the main planting beds once temperatures consistently stay above 50°F. Remove dead stalks, old mulch that has matted down, and any “mummy fruits” left over from the previous season. These materials often harbor fungal spores and pests that are just waiting for warmer weather to attack your new plants.
Weeding is equally critical. Early spring is when “winter annual” weeds, such as chickweed and henbit, begin to set seed. Pulling them now, before they can release thousands of new seeds into your soil, will save you hundreds of hours of labor later in the summer. Ensure you pull the roots entirely; many spring weeds have taproots that can regrow if even a small piece is left behind.
Managing Compaction Without Destroying Structure
It is tempting to grab a heavy rototiller the moment the sun comes out, but be cautious. Tilling wet soil can actually destroy the soil structure, creating a “hardpan” layer beneath the surface that roots cannot penetrate. Instead, wait until the soil is dry enough that it doesn’t stick to your tools.
For most home gardens, a broadfork or a simple garden fork is a better choice. These tools allow you to aerate the soil and break up compaction without completely inverting the soil layers. This “no-till” or “low-till” approach preserves the delicate fungal networks (mycorrhizae) that help your plants grow. If you must till, do it only once and at a shallow depth to avoid churning up a fresh batch of dormant weed seeds from deep within the earth.
Amending and Improving Soil Before Spring Planting
Once the ground is clear and aerated, it is time to “feed the soil so the soil can feed the plants.” This is where the magic happens.
The Power of Organic Matter: Your Soil’s Lifeblood
If there is a “silver bullet” in gardening, it is high-quality organic matter. Whether you have heavy clay or light sand, compost is the solution. For clay, it improves drainage and aeration; for sand, it increases water retention and nutrient-holding capacity.
Incorporate two to four inches of well-rotted compost into the top six inches of your soil. This provides a slow-release source of nutrients and introduces beneficial microbes. If you do not have your own compost pile, look for certified organic sources or leaf mold from local municipalities.
Specialized Amendments for Specific Needs
Sometimes, compost is not enough to fix specific structural issues. Here are some other spring soil preparation tips for amendment:
- Leaf Mold: Specifically great for improving soil structure and water retention without adding too much heavy nitrogen. It mimics the natural floor of a forest.
- Worm Castings: An incredible “superfood” for soil, rich in enzymes and beneficial bacteria that boost plant immunity.
- Greensand: A slow-release source of potassium and minerals, particularly useful for breaking up heavy clay and improving the “tilth” or workability of the earth.
- Aged Manure: Highly effective, but ensure it is “hot” composted first to kill off any pathogens or weed seeds that survived the animal’s digestive tract.
Understanding pH Adjustments
If your soil test indicated an acidic pH (below 6.0), spring is the time to apply garden lime (calcium carbonate). If your soil is too alkaline (above 7.5), you may need to apply elemental sulfur. Be aware that these adjustments take time to work as they rely on chemical reactions within the soil solution. Applying them in early spring gives the soil chemistry time to stabilize before the peak growing season begins in May and June.
Utilizing Green Manures and Cover Crops
If you were proactive and planted cover crops like winter rye or clover in the fall, your spring soil preparation includes “terminating” these crops. Mow them down and lightly incorporate the green matter into the soil at least three weeks before you plan to plant. This process, known as “green manuring,” adds a massive boost of nitrogen and organic bulk directly into the root zone as the plants decompose.
Nutrient Management: Balancing the Buffet
While compost provides a great base, some heavy-feeding plants (like tomatoes, roses, or hydrangeas) require a more concentrated nutrient boost.
Organic vs. Synthetic Fertilizers
When preparing garden soil for planting, you must decide between using organic or synthetic fertilizers.
- Organic Fertilizers: These include bone meal (for phosphorus), blood meal (for nitrogen), fish emulsion, and kelp meal. They break down slowly, improving soil health over time and providing a steady stream of nutrients. They are safer for the environment and will not “burn” your plants if applied slightly too heavily.
- Synthetic Fertilizers: These provide an immediate “hit” of nutrients. While useful for correcting severe deficiencies quickly, they do nothing for soil structure and can sometimes harm beneficial soil life or leach into groundwater if overused.
The N-P-K Ratio Decoded
Always follow the “N-P-K” (Nitrogen-Phosphorus-Potassium) ratios on the bag based on your soil test results.
- Nitrogen (N): Promotes leafy, green growth. Essential for the early stages of a plant’s life.
- Phosphorus (P): Encourages strong root development and flower/fruit production.
- Potassium (K): Enhances overall plant health, water regulation, and disease resistance.
Over-fertilizing, especially with nitrogen, can lead to lush green growth that is weak and highly attractive to pests like aphids. Balance is the key to a resilient garden.
Advanced Drainage Solutions: Dealing with Spring Floods
Spring is notoriously wet. If you find that certain areas of your garden remain soggy long after the rain stops, you may need to implement more aggressive drainage strategies during your garden soil preparation steps.
Raised Beds and Mounds
If your soil is heavy clay and sits in a low spot, the easiest way to manage drainage is to go “up.” Raised beds allow you to control the soil mix entirely, ensuring it stays aerated and well-drained even during heavy spring downpours. Even simple mounding (creating “berms” of soil) can protect the root crowns of sensitive plants from sitting in standing water, which prevents “wet feet” and fungal infection.
French Drains and Swales
For larger properties, you might need to divert water away from your garden beds. A French drain—a trench filled with gravel and a perforated pipe—can move subsurface water away from your growing areas. Swales, which are shallow, wide ditches designed to slow and infiltrate water, are an excellent permaculture technique for managing runoff while keeping the moisture available for nearby trees.
The Role of Trees in Your Garden Ecosystem
Many homeowners view their garden beds and their trees as two separate entities, but they are deeply interconnected. The soil preparation for spring garden projects should always take nearby trees into account.
Root Competition and Nutrient Sharing
Large trees have expansive root systems that often extend far beyond their drip line. When you are improving soil before spring planting in a bed near an oak or a maple, you aren’t just feeding your flowers; you are interacting with the tree’s root system.
Trees and smaller plants often share nutrients through a “Wood Wide Web” of mycorrhizal fungi. However, trees can also out-compete smaller plants for moisture during dry spells. This is why a tree health inspection is a vital part of spring planning. An arborist can help you identify if a tree is stressed, which might lead it to aggressively “steal” nutrients from your garden beds, or if its roots are becoming girdled by the very soil amendments you are adding.
Managing Shade and Airflow
Soil health is also impacted by the environment above it. If your trees are overgrown, they may prevent the soil from warming up in the spring or keep it too damp, leading to fungal issues like damping-off in seedlings. Strategic pruning can improve light penetration and airflow, which in turn helps the soil maintain a healthy temperature and moisture balance.
The Canopy-Soil Connection
Fallen leaves from your trees are nature’s original soil amendment. If you have “clean” leaf litter (from healthy trees), consider shredding it and using it as a soil conditioner. However, if your trees are showing signs of disease, such as leaf spot or anthracnose, those leaves should be removed from the site to prevent the soil from becoming a reservoir for pathogens.
Final Steps: Bed Shaping and Mulching
As you finalize your garden soil preparation steps, focus on the finishing touches that will protect your hard work throughout the summer.
Defining Your Beds for Better Management
Early spring is the perfect time to “edge” your garden beds. Use a sharp spade to cut a clean, V-shaped line between your lawn and your garden. This prevents aggressive turf grasses from creeping into your freshly prepared, nutrient-rich soil. It also helps with drainage, as the small trench acts as a miniature collection point for surface runoff.
The Importance of Mulching: The Earth’s Protective Layer
Once your soil is amended and your plants are in the ground (or the seeds are sown), you must protect the surface. Mulch is the “skin” of the earth. A 2-to-3-inch layer of wood chips, shredded bark, or straw:
- Regulates soil temperature: Keeps roots cool in the summer heat and warm during late spring cold snaps.
- Retains moisture: Reduces the need for supplemental watering by up to 50% by preventing evaporation.
- Suppresses weeds: Blocks the light that weed seeds need to germinate, saving you hours of maintenance.
- Prevents Erosion: Stops heavy rain from washing away your expensive topsoil and amendments.
Be careful not to “volcano mulch” around the base of trees or shrubs. Keep the mulch a few inches away from the stems and trunks to prevent bark rot and pest entry. As the mulch breaks down over the year, it will continue to add organic matter to the soil below.
Timing is Everything: The Gardener’s Calendar
One of the most common mistakes in spring soil preparation is starting too early. If you work soil that is too wet, you create clods that turn into “bricks” once they dry out.
The Squeeze Test
Wait for the “Golden Rule of Soil”: Take a handful of soil and squeeze it.
- Too Wet: If water drips out, or if it stays in a solid, glistening ball that won’t break when poked.
- Perfect: If it forms a loose ball that crumbles beautifully like a chocolate cake when you tap it with your finger.
- Too Dry: If it won’t form a ball at all and feels like dust.
Generally, in temperate climates, late March to mid-April is the ideal window for these activities. Working the soil when it’s still frozen can also damage the soil’s structure and kill off early-waking beneficial organisms.
Maintaining Soil Health Throughout the Season
Your spring preparation is the “big push,” but soil health requires ongoing attention. As your plants grow, they will deplete the nutrients you’ve added.
Side-Dressing and Liquid Feeding
Halfway through the growing season (usually around July), many plants benefit from “side-dressing.” This involves placing a small amount of compost or organic fertilizer around the base of the plant. For immediate pick-me-ups, liquid organic fertilizers like compost tea or seaweed extract can be applied to both the soil and the foliage to provide trace minerals that are quickly absorbed.
Watering Wisdom
How you water affects your soil structure. Heavy, overhead watering can compact the surface and lead to “crusting,” which prevents air and water from penetrating. Instead, use drip irrigation or soaker hoses. These deliver water slowly and deeply, encouraging roots to grow downward into the cooler, more stable layers of the soil rather than staying near the surface where they are vulnerable to heat and drought.
Integrating Your Entire Landscape: The Holistic Approach
A truly flourishing garden doesn’t exist in a vacuum. The soil in your flower beds is part of the same geological system as the soil under your lawn and beneath your massive shade trees. Treating the landscape as a single organism leads to better results for every plant involved.
Tree Root Protection Zones
When preparing your soil, be mindful of the “Critical Root Zone” (CRZ) of your trees. This is generally the area directly under the tree’s branches (the drip line). Digging too deeply in this area to create a new garden bed can sever vital feeder roots, leading to canopy dieback months or even years later. If you want to garden under a tree, use light applications of compost and mulch rather than deep tilling.
The Impact of Soil pH on Tree Health
Just as your garden plants have pH preferences, so do your trees. For example, pin oaks and azaleas require acidic soil; if the soil becomes too alkaline (often due to runoff from concrete or excessive lime application in a nearby garden), they will develop iron chlorosis, where the leaves turn yellow while the veins stay green. Your spring soil adjustments should always consider the long-term needs of the woody plants that anchor your property.
Professional Oversight for Large Landscapes
If you have a property with mature specimen trees, the complexity of soil management increases. A tree health inspection can reveal if the soil around your trees is becoming too compacted from foot traffic or if construction nearby has altered the water table.
Our arborists at Taylor Expert Arborists can provide “Vertical Mulching” or “Air-Spading” services. These are advanced techniques that use high-velocity compressed air to aerate the soil around tree roots without damaging the delicate bark. This is often the only way to save a mature tree that is struggling due to soil compaction in a high-traffic garden area.
Troubleshooting Common Spring Soil Issues
Even with the best preparation, you might encounter specific challenges as the season progresses.
Soil Crusting and Capping
In soils with high silt content, the surface can form a hard crust after heavy rain followed by sun. This “capping” prevents seedlings from emerging and stops air exchange. If this happens, lightly scuff the surface with a hand rake or hoe to break the seal without disturbing the seeds below.
Nutrient Leaching in Wet Springs
If your spring is exceptionally rainy, even your best amendments can be washed deep into the subsoil. Look for signs of nitrogen deficiency, such as pale green or yellowing lower leaves on young plants. A quick application of a liquid organic fertilizer can bridge the gap until the weather stabilizes and the soil’s natural nutrient cycling catches up.
Salt Buildup from Winter De-Icers
If your garden beds are near a driveway or sidewalk where salt was used during the winter, your soil may be “salty.” High salt levels prevent roots from taking up water, effectively dehydrating the plant even in moist soil. If you suspect salt damage, flush the beds with large amounts of fresh water in early spring to leach the salts below the root zone.
Setting the Stage for Success
Learning how to prepare your soil for spring gardening is a journey of discovery that pays dividends in every bloom and every harvested vegetable. By assessing your soil’s chemistry, clearing away the remnants of winter, and thoughtfully adding organic amendments, you create an environment where life can flourish. Your garden is not just a collection of plants; it is a complex, living system that deserves a strong start.
At Taylor Expert Arborists, we understand that a beautiful garden begins with a healthy foundation. While you focus on the beds and the blooms, let us help you care for the “pillars” of your landscape—the trees that provide shade, structure, and character to your home. Whether you need a comprehensive tree health inspection to assess canopy impact on your garden or you require expert pruning to improve light levels and airflow to your soil, we are here to support your vision.
A thriving garden is the result of patience, science, and a little bit of dirt under the fingernails. Start your soil preparation today, and you will reap the rewards all season long. For any assistance with your trees or for more professional landscaping advice, please contact us today. Let’s make this spring your garden’s best season yet!


